Como instalar el programa PYWWS para recoger los datos de una estación meteorológica.
Nota: comprobar las versiones de los programas que están en la actualidad.
Instalar Git
sudo apt-get install git
Instalar python-dev
sudo apt-get install python-dev
sudo apt-get install libudev-dev
crear un directorio para descargar y descomprimir los ficheros de instalación
cd ~
mkdir dls
cd dls
Descargar las librerías y utilidades necesarias
wget http://pypi.python.org/packages/source/C/Cython/Cython-0.16.tar.gz
wget http://sourceforge.net/projects/libusb/files/libusb-1.0/libusb-1.0.9/libusb-1.0.9.tar.bz2
git clone https://github.com/gbishop/cython-hidapi.git
Descomprimir los ficheros que habíamos descargado.
tar xvzf Cython-0.16.tar.gz
tar xvjf libusb-1.0.9.tar.bz2
Compilar e instalar Cython 0.16 (esto puede llevar un tiempo)
cd ~/dls/Cython-0.16
sudo python setup.py install
cd ~/dls/libusb-1.0.9
./configure
make
sudo make install
cd ~/dls/cython-hidapi
Editar el fichero de conflagración: setup.py
sudo nano setup.py
Cambiamos la linea:
os.environ['CFLAGS'] = "-I/usr/include/libusb-1.0"
a
os.environ['CFLAGS'] = "-I/usr/local/include/libusb-1.0"
Cambiamos la linea:
os.environ['LDFLAGS'] = "-L/usr/lib/i386-linux-gnu -lusb-1.0 -ludev -lrt"
a
os.environ['LDFLAGS'] = "-L/usr/lib/arm-linux-gnueabihf -lusb-1.0 -ludev -lrt"
Copiar el fichero libudev.so.0
sudo cp /lib/arm-linux-gnueabihf/libudev.so.0 /usr/lib/arm-linux-gnueabihf/libudev.so.0
sudo python setup.py install
Descargar la ultima versión pywws http://pypi.python.org/pypi/pywws/
cd ~
sudo mkdir weather
cd weather
sudo git clone https://github.com/jim-easterbrook/pywws.git
Conectar la estación a la Raspberry con el conector USB
Cambiamos al directorio:
cd ~/weather/pywws
Comprobamos la conexión de la estación meteorológica.
sudo python -m pywws.TestWeatherStation
Debería ver una serie de números hexadecimales si la conexión está funcionando.
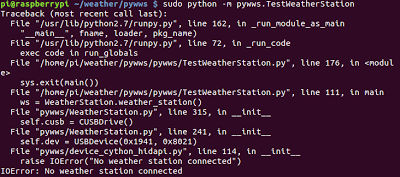
Si no tiene conexión o no esta conectada:
Si esta conectada daría:
pi@raspberrypi ~/weather/pywws $ sudo python -m pywws.TestWeatherStation

Ya tenemos instalado el programa ahora falta configurarlo.